Content
See also: Not VAT registered
-------------------------
General
In Briox you can automatically post values as accumulations to the VAT-report by posting the VAT directly to designated VAT-accounts. When handling VAT this way, the VAT-accounts get their individual rows instead of being presented as dimensions on the purchase or sales accounts rows.
The default chart of accounts available in the program is prepared for automated VAT handling and contains all the necessary accounts which will lift values posted on them to the VAT-report.
In this article we describe:
- how to get values to VAT- accounts automatically instead of counting and posting values manually.
- how values are lifted to the VAT report.
- how you can customise your accounts for VAT handling.
VAT codes
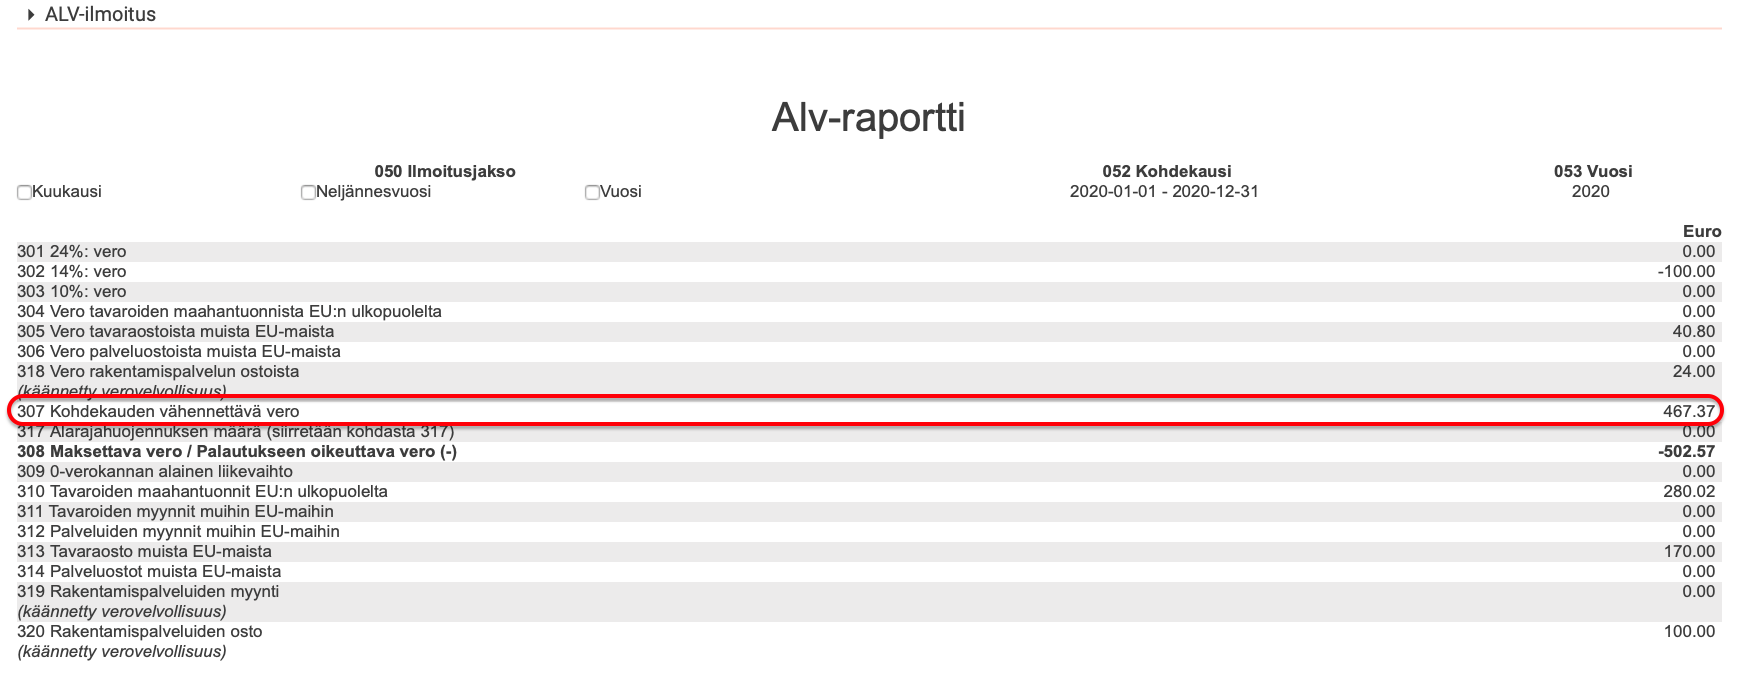
At the account level, you can set a VAT-code on an account. Each VAT code sends the amount to a designated box of the VAT report. See below for example, code U1 sends the accumulated amount to Box 301 of the VAT report.

When you post a transaction to an account which has a VAT-code, the system will automatically lift the total amount posted on that account, as an accumulation, to its designated Box on the actual VAT-report.
You can customise or set up your own accounts to handle VAT. Go to Registry - Chart of Accounts and choose an account.
See below the settings for account 1763 - Input VAT in our default CoA:
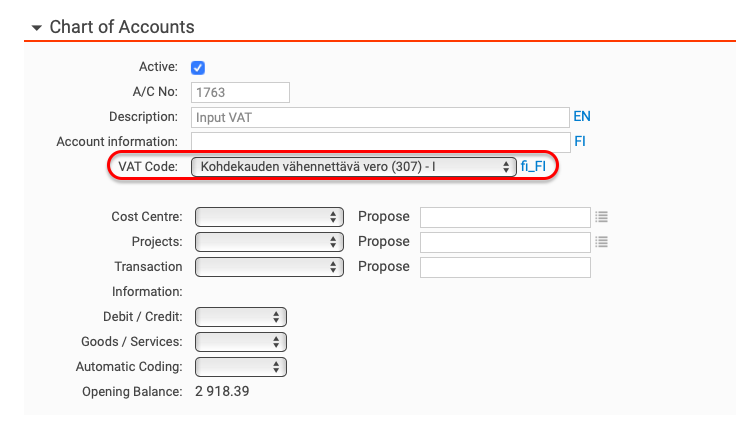
When a value is posted to this account, this value will be added to the accumulated value of code 307 - VAT to be deducted for the reporting period on the VAT report.
The VAT Report
When you go to the VAT report, Report - VAT Report you will automatically see the Standard view of the report. This version presents the accumulated total amount posted on each VAT code for a given period.
If you want to see what accounts the VAT has been posted to, you can choose the Detailed version of the report under Report Options.
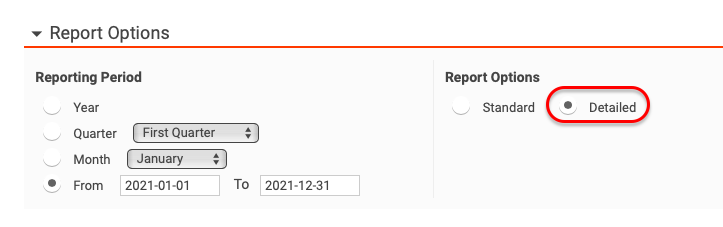
This version of the report presents a list of all accounts with a selected VAT-code, grouped beneath their VAT-code/box. See below.
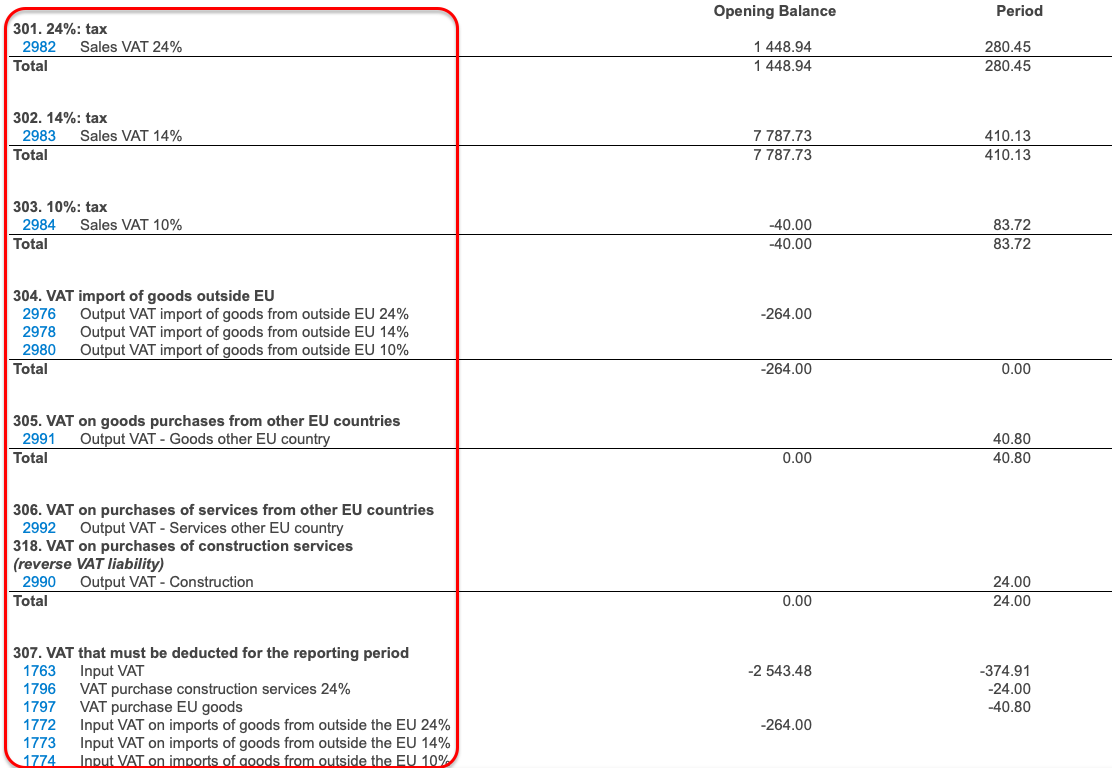
In the Period column you see the accumulated value for the selected period for each account. If you want to control the accumulated value for a specific account you can drill down to the general ledger by clicking on the account number.
The general ledger will automatically have the same date selection as the VAT report.

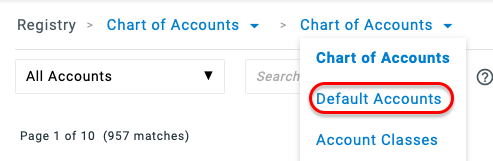
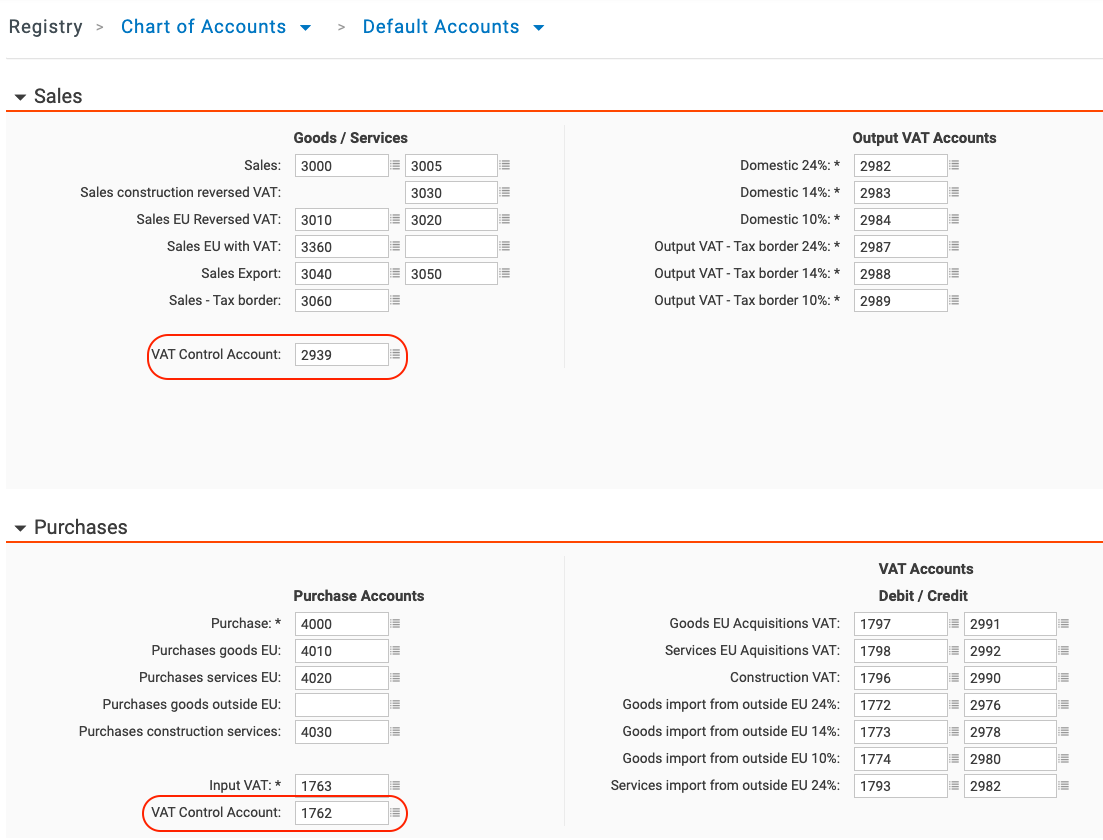
Default Accounts: VAT
You can find the program's default accounts under Registry - Chart of Accounts - Default Accounts. When you post a customer, or a supplier invoice in the program, all the accounts used in the journal will be selected from here automatically.
When you set a VAT-type for a customer or a supplier in the registry, the system system will automatically allocate the corresponding Sales or Purchase account as well as the corresponding VAT accounts. The items on the customer invoice or Purchase order can play a role in setting the VAT rate.
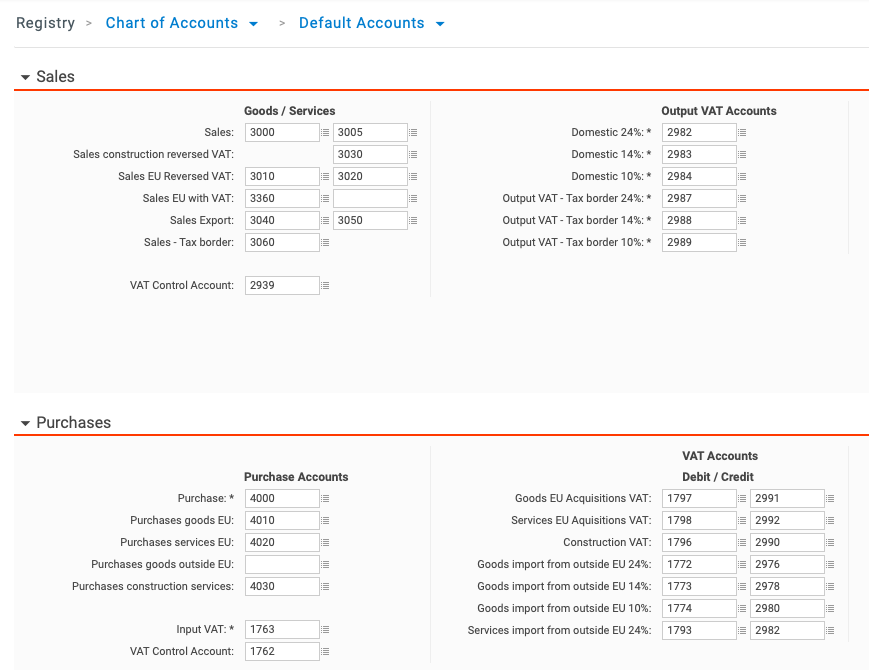
Below you can see list of all default sales/ purchase accounts in their respective clusters. You don't have to use these accounts on your P&L booking. The offered P&L accounts can be changed when you are creating a new invoice. Note: the VAT accounts cannot be changed while creating an invoice.
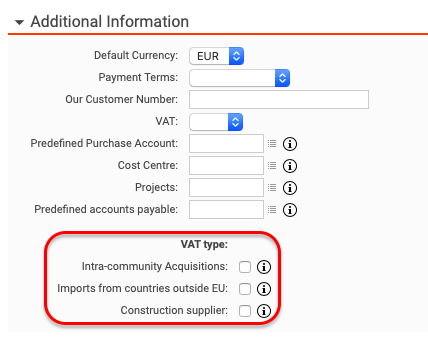
You can also set up predefined accounts for individual suppliers and customers in Registry. See below in the the supplier Registry, the predefined purchase account & VAT type.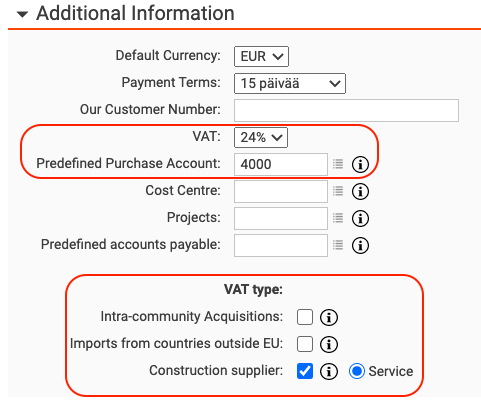
Automatic VAT-handling
Transactions containing VAT can be allocated to suitable VAT account(s) automatically based on rules.
On invoices VAT handling is determined by the VAT type chosen for a customer or a supplier in the the registry.
In Accounting and Banking you can allocate the VAT automatically with the help of our journal templates.
VAT handling in supplier invoices
Under Registry - Suppliers, you can add a supplier and determine their VAT-type in the section for Additional Information. If you do not set a VAT-type then the type will automatically be Domestic.
When creating a supplier invoice, enter the gross amount of the invoice into field Total. In the drop down below, select the VAT-rate for this invoice. Based on chosen VAT rate, the system will calculate the VAT amount & select the correct account to post it on.
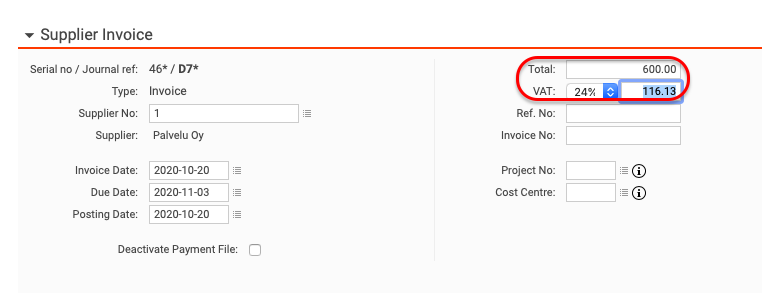
The net value of your invoice will appear as a difference which can be allocated to one or several cost accounts in the coding view.

If you need to change the VAT rate or VAT type you can alter these and the system will adjust the VAT calculation and allocate the adjusted value(s) to the correct VAT account(s).
Read more about supplier invoices with multiple VAT rate.
VAT handling in sales invoices
Under Registry - Customers, you can add a customer and determine their VAT type in the section for Additional Information. If you do not set a VAT-type then the type will be Domestic.

Prices include VAT
This checkbox can be found under Additional Information and determines how the VAT will be displayed on the item rows of the sales invoices. The box can also be selected when creating a customer invoice.
Prices include VAT works as follows:
- If the checkbox is not selected then values entered will be processed as net values. The system will calculate and add the VAT amount on the invoice. The calculation is based on the sales account(s) and VAT rate(s) defined on the invoice rows. In the journal created form the invoice, the sales account will get the amount allocated to it on the item rows of the invoice, and the VAT will be automatically allocated to the corresponding VAT account.
- If the checkbox is selected then values entered will be processed as gross values. The system will automatically calculate the VAT from the entered value(s) and allocate it to suitable VAT accounts in the journal which will be created from the invoice. In the journal the VAT amount will be reduced from the sales account(s).
In a customer invoice, the VAT-rate is determined by the sales account on the item row level. The system looks first if anything is set on the item, then on the customer & if nothing is registered there, accounts will be picked from the default accounts according to the customer type. You can have more than one VAT-rate on your invoice by setting different sales account for different item rows.

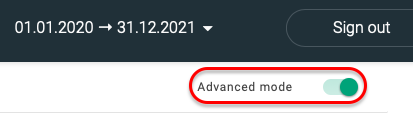
To be able to see both the A/C No and VAT columns, you will need to augment your invoicing view by enabling Advanced mode.
NOTE! If you want to lift your sales to the ES sales list report please read this article.
VAT handling in manual accounting
If you create journals manually under Accounting - Journals or if you create journals from transactions directly under Banking - Process Transactions, we recommend you to use journal templates to help you automate your postings, especially if your transactions contain VAT.
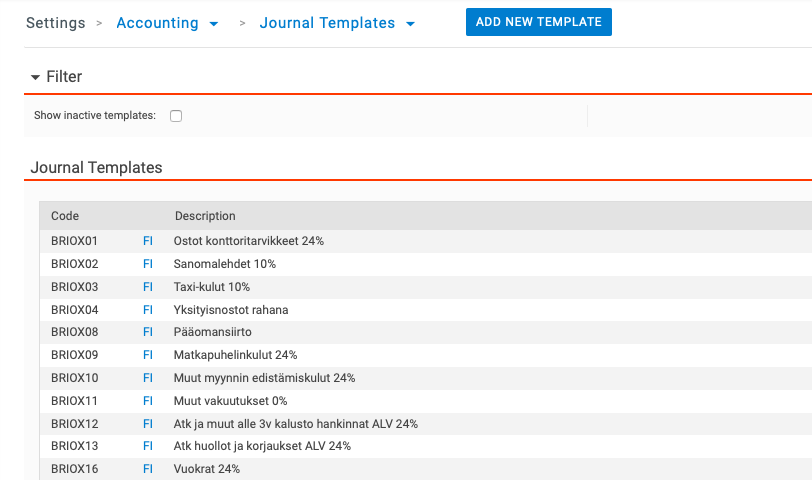
Journal templates are posting rules. You can find our default journal templates under Settings - Accounting - Journal Templates.
For example, our default journal template for Purchases 24 % looks like this.

The template contains three selected accounts and formulas for each of these accounts. When you use this template and enter a sum it will be allocated it to these accounts according to the formulas. In this case:
- account 4000 will get the net value based on the gross value you enter
- account 1763 will get the VAT amount calculated from your gross value
- 1910 gets the gross value
Account 1763 has a default VAT code selected, so when you post the journal you have created with this template the value on 1763 will be lifted to VAT report automatically.
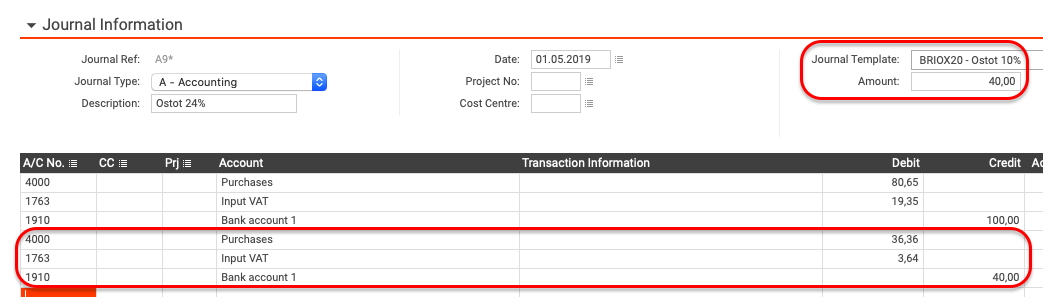
When creating a journal you can choose a journal template from the drop down.

When you have selected a suitable template you can enter the gross amount in the field Amount and the system will take care of allocating everything according to the template.


If the transaction you are booking contains more than one VAT-rate you can select and use more than one journal template. After having used a first template to book a portion of the transaction, you can select a second template, enter an amount and the system will create entries according to this template under the previous ones.
Before posting the journal you can freely edit all fields in the registration view, except for the Journal Ref. For example if you want to use a different P&L account you can change the account which has been selected by the template.
VAT handling in banking
Account statement which have imported to Briox can be handled under Banking - Process Transactions. Those transactions which are payments that correspond to open invoices can be matched directly. But here you can also book transaction which do not correspond to any invoices. As in Accounting, we recommend you use journal templates to book transactions directly in banking.
under Settings - Accounting - Journal templates you can select templates to be used in Banking.

These so-called Banking Templates can be found under Process Transactions in the in the drop down menu in the right hand column. When Banking Templates is selected, all the templates you marked for banking are visible and you can drag an unprocessed transaction from the right hand list to the suitable template. The system will create a journal according to the template with parameters picked from the transaction(s).
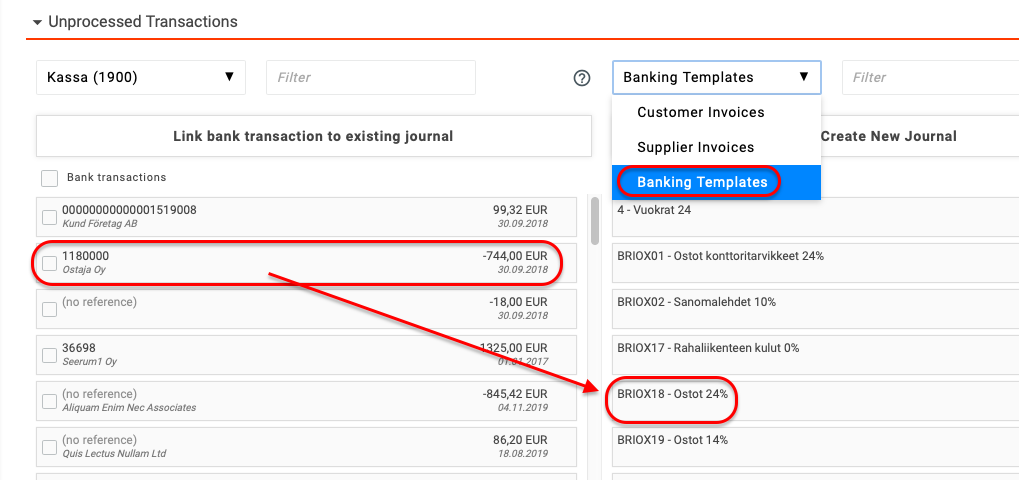
If you cannot find a suitable template you can drag a transaction to Create New Journal.

In the window that appears you can select even those journal templates which were not selected for Banking. If a suitable template still cannot be found, you can move to Manual Entry and book the transaction manually.

VAT handling with cash method
Accounting principle can be selected while creating a new financial year. If you choose Cash Method this will have an affect on default accounts on our Default COA. With cash method you can book VAT for supplier and customer invoices as have been described in respective chapters above. Difference between between Performance and Cash methods is when VAT will be lifted to the VAT report.
With Performance method VAT will be lifted to the report when invoices are posted (with programs default settings this means the phase when a B- /D-serie journal is created).
With Cash method VAT will be lifted to the report when a payment/ payments are registered to an invoice (with programs default settings this means the phase when a C- /E-serie journal is created). With this method when invoice is posted the amount of VAT will be booked on preliminary VAT account. Balance from used preliminary account will be allocated to actual VAT account while payment (s) are registered.
VAT-reporting
The VAT-report can be created and submitted from under Report - VAT Report. Before processing the report we recommend you check that the values posted on each VAT code are correct.
NOTE! The amounts presented in the VAT report are based on bookings dated to the period which you have selected. The program looks for the cumulative amounts booked on each code for the period and not for a balance of accounts.
1) Create a VAT report file
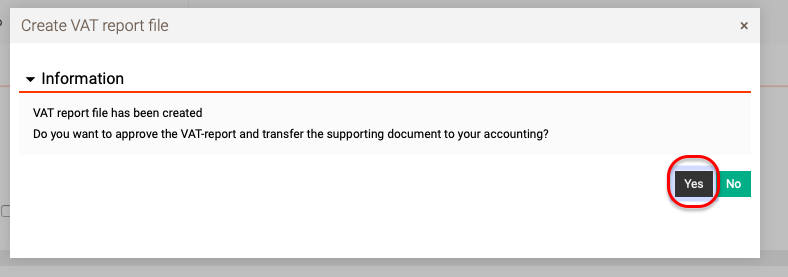
At the bottom of the page click on Create VAT report file to get a TXT-file of the report.

When the file has been generated the system will offer you the possibility to create a VAT report journal in Accounting. By clicking Yes, the system will create a journal which will close the VAT period accounting-wise.
All transactions included in the VAT report are marked as submitted in the journal list

& the VAT accounts are emptied to the VAT control account. We recommend that you always use this method.
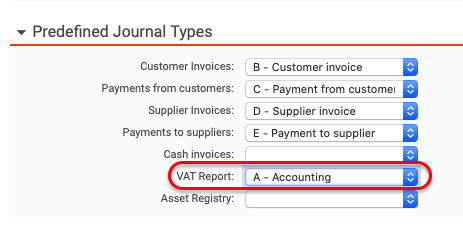
The journal will be allocated to journal type which has been predefined for VAT-reporting under Settings - Accounting - Journal Types.
2) Submit the VAT report online
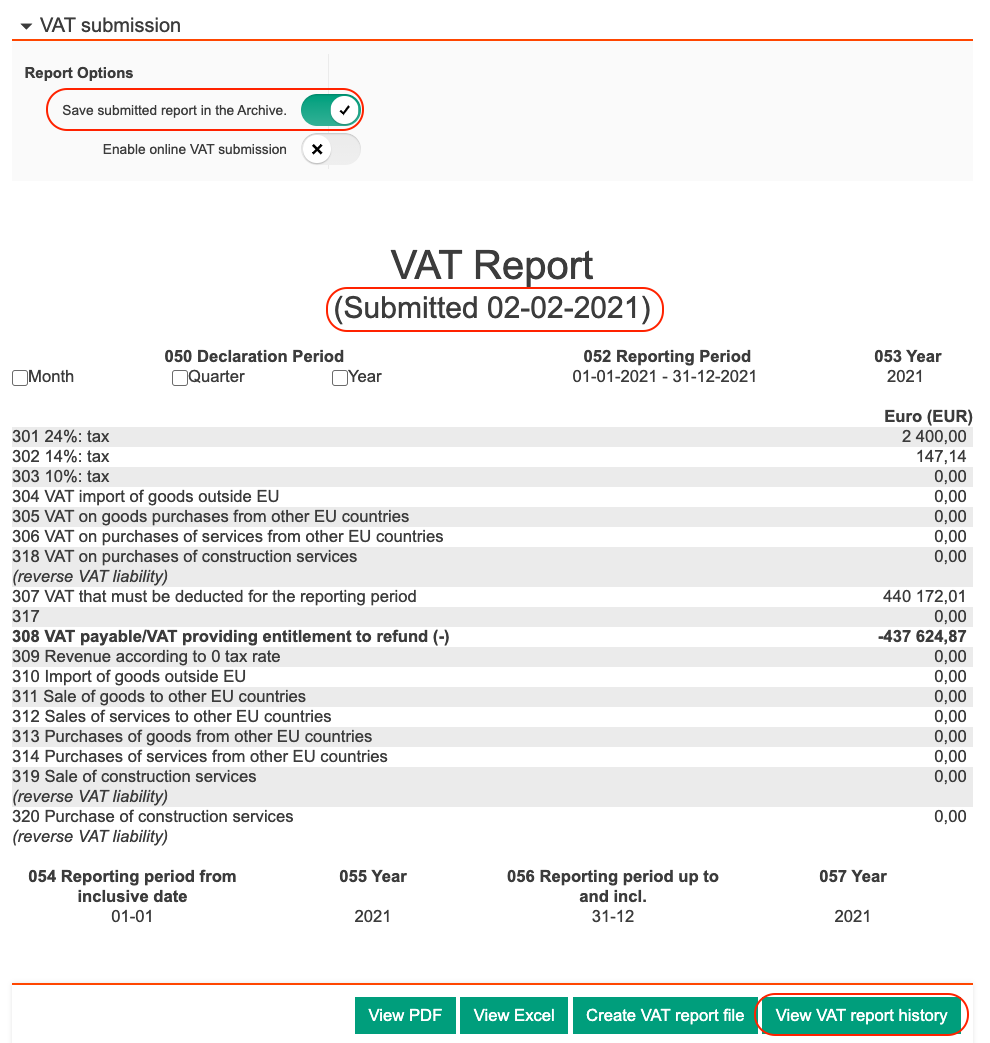
Before you can submit the VAT report from Briox you need to activate the Vero integration. When you have an active integration you can Enable online VAT submission from the VAT report under Report Options.

When submission has been enabled you can find a Submit report online button at the bottom of the page which will enable you to send the report from the program. After submission, the system will offer you the same possibility to create a VAT journal as described above.
A VAT report can be created and posted more than once for each period if necessary.
If you want to pay your VAT from Briox, simply add the correct authority to the supplier registry like any other supplier.
If you are unsure regarding which accounts you should use to report your VAT please contact your accountant.
VAT report History
In the VAT report view, under Report - VAT report, you have the possibility to view all previously submitted VAT reports.
Click on the VAT report history button and new window will appear with several filtering options.
You can search for VAT reports by:
- Submission date
- Reporting Period
- Financial Year
Click on the report you want to examine more closely. The report opens up in the same window and under the heading “VAT Report” you can see the Submission date of the report.
Submitted VAT reports can also be saved in the Linked Documents section of the Archive , under VAT Reports. Read more.