General
The balance confirmation report enables you to send automatically, to both your customers and suppliers, a statement to agree upon your mutual debt at any point in time.
The amount due presented in the report is taken from the customer and supplier sub-ledger reports.
If prepayments are booked on a customers, the report will show the prepayments as a separate row and a total owed minus any prepayments will be displayed.
The report will display owed balances in the currency of the invoice and will not convert any currencies. When handling a mix of currencies we will present a table for each currency, underneath each other.
When a company is both a customer and a supplier, we will present one table for each : The company as a customer & the company as a supplier.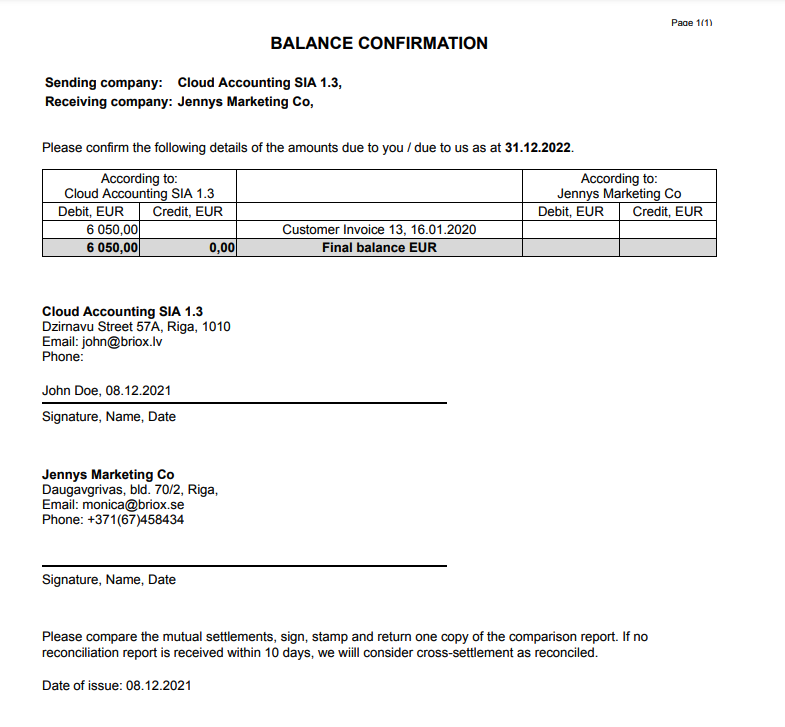
Where:
To find the Balance confirmation report, go to Reports in the main left hand menu and select Reports again. The balance confirmation reports can be found under the accounting reports.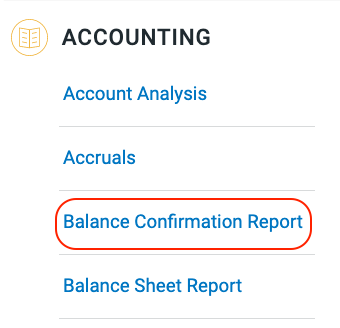
User Rights:
A user needs to have access to reports under accounting to be able to work with this report.
The Reports selection window
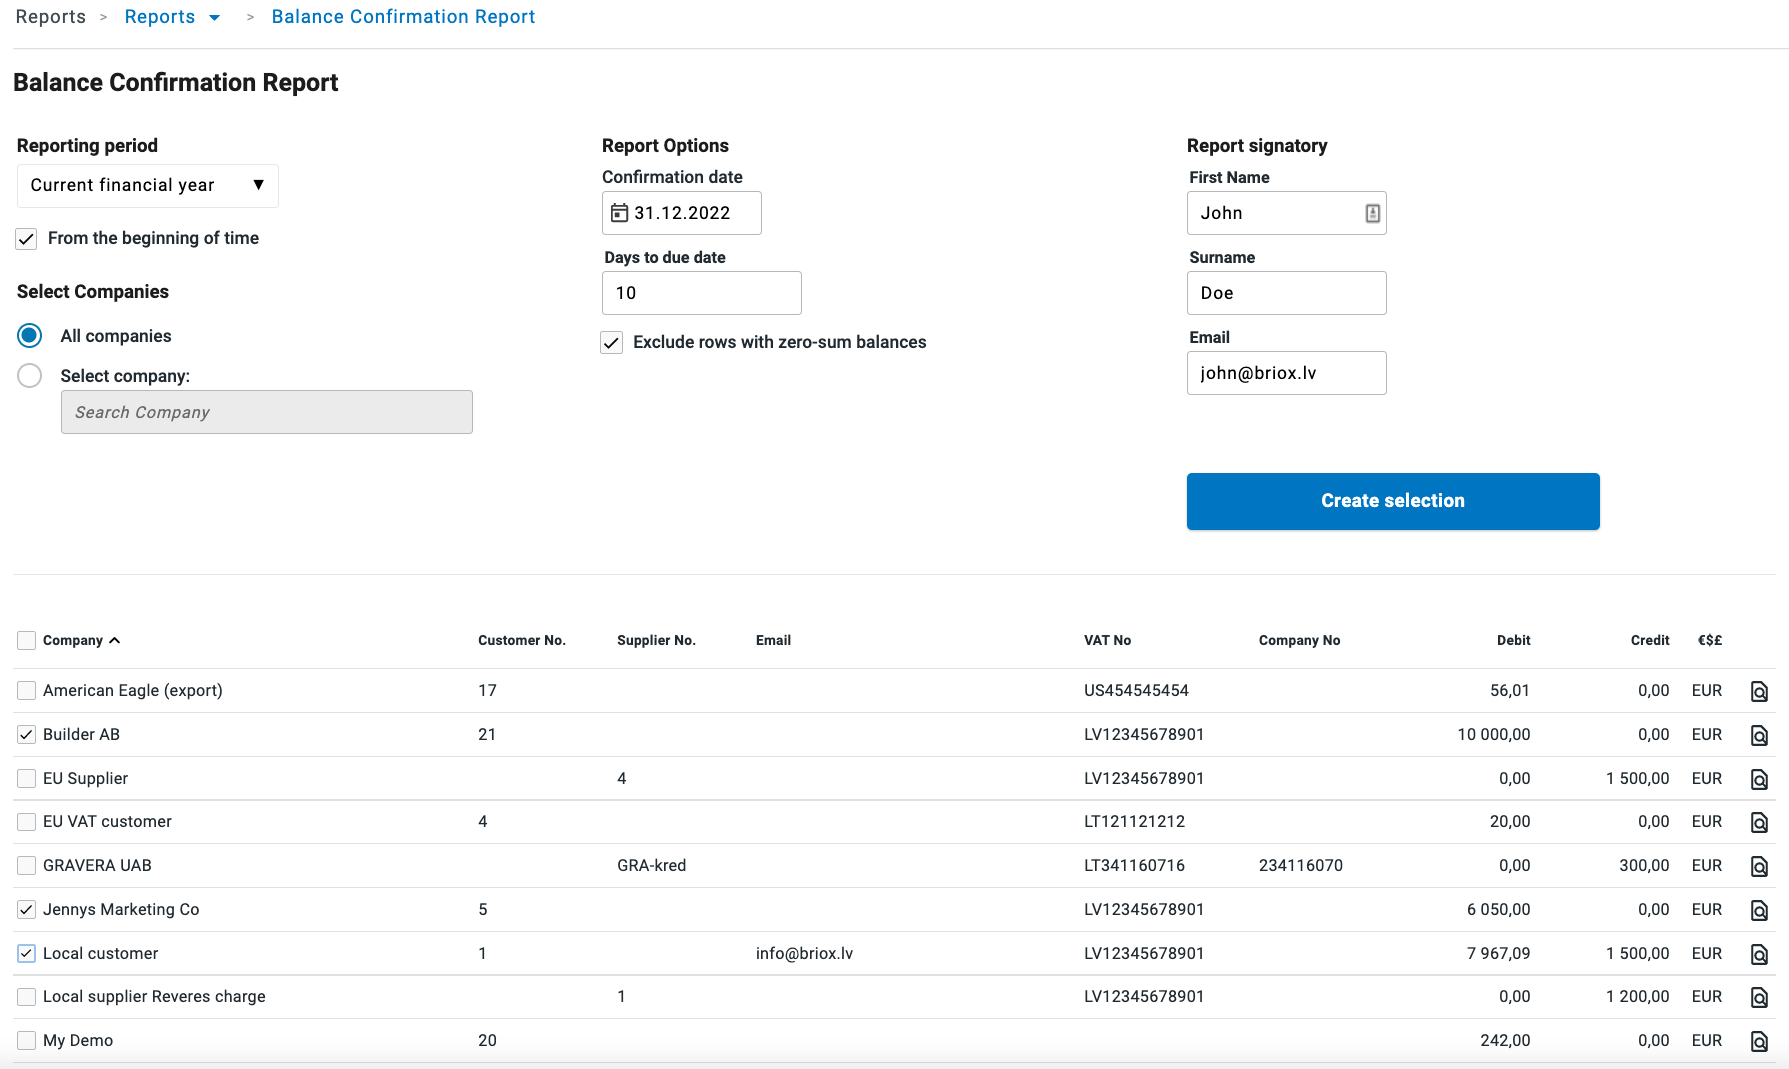
Reporting Period:
The reporting period can be Year, Quarter, Month or freely determined. The from period will be from the beginning of time (or beginning of the first financial year you have in Briox) by default but you have the possibility to choose the beginning of the current financial year.
Select companies:
You can choose to view all companies in the list and this will include all your customers and all your suppliers. So that the list does not become too long the checkbox: Exclude rows with zero-sum balances will be selected by default.
You aslo have to option to search for a specific company by using the Select company search field.
Report Options:
Confirmation date: The confirmation date appears in the report as the date at which the balances are taken. See below: 31-12-2022
Days to due date: The amount of days your customer or supplier has to confirm or disagree with the statement, otherwise the cross-settlement will be automatically considered as reconciled. See below: 10 days.
Report Signatory:
The data entered here appears in the report.
The data you input is remember between sessions.
Create selection and Preview
Once you have entered all the parameters in the report selection window click Create selection.
All the companies will appear in the list and in the background the report template will be ready with your input.
To preview the report for any one contact click on the preview icon at the end of the row: 
Email document
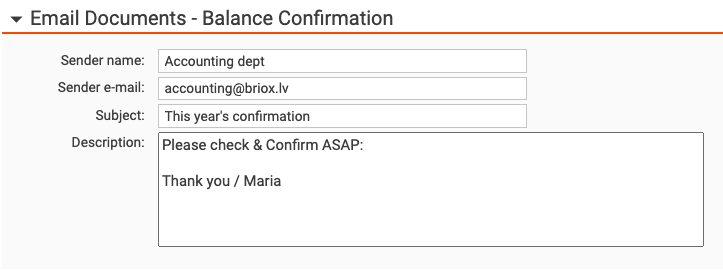
If you are going to email the reports as attachments to a standard mail, please make sure to create an email document.
Go to Settings - Invoicing / Accounting - Email documents.
Send the report
To select who the reconciliation reports should be sent to, select the companies by checking the boxes on the left hand side of the list.
If you want to sort the list you can click on the columns to re-order the list.
To dispatch, select export PDF or send mail.
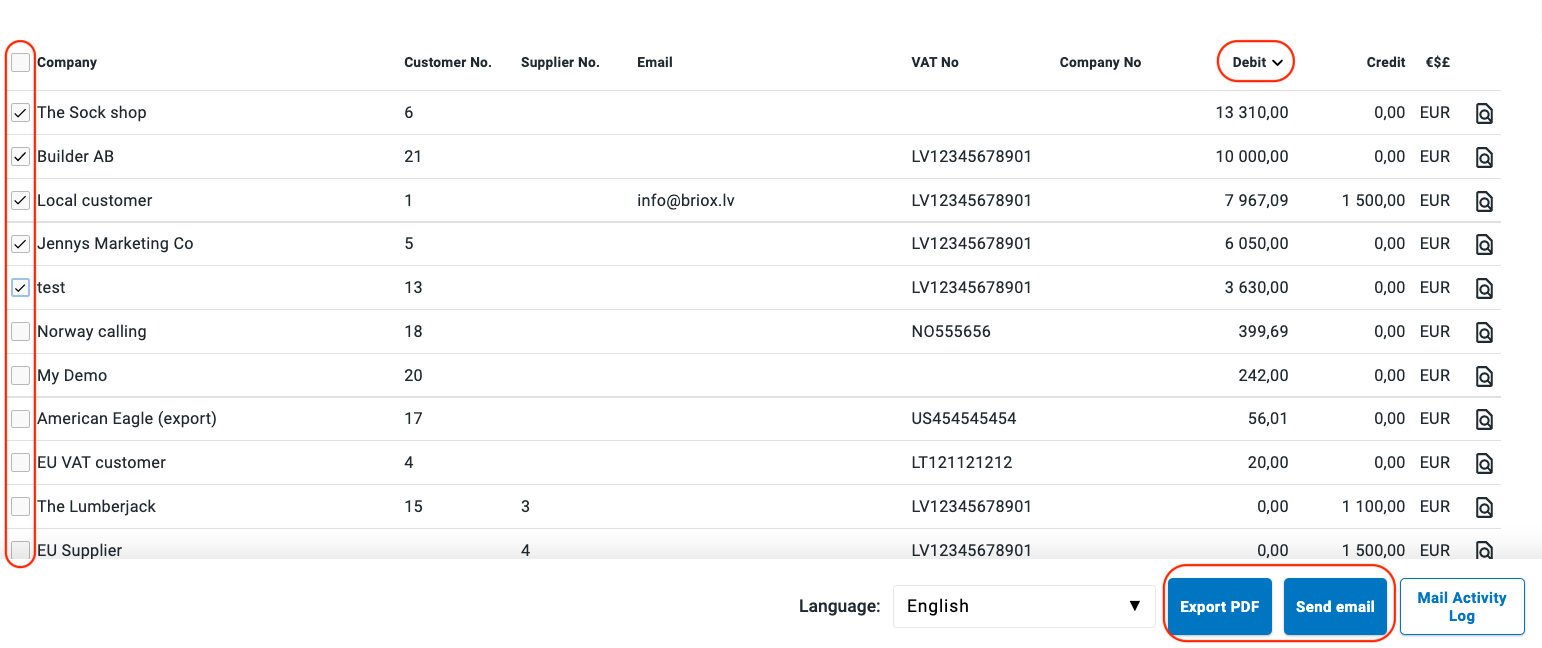
If the PDF reports are too numerous they will automatically queued and you will be prompted to pick them up under Reports- Queued jobs.
Mails are always queued and dispatched a couple of minutes later.
Logs and tracking
- A copy of the reports are automatically stored in chronological order in the linked documents section of the archive.

- You action will be logged in the activity log,

- The dispatched mails can be tracked in the email activity log.

- In the list itself, an icon indicates that the reconciliation has been sent to the customer, for which period and by whom.


Comments
0 comments
Please sign in to leave a comment.