You can create a sales order in two ways. You can either register an order from scratch as described in the workflow below, or you can go into an existing quote and create an order based on it. Read more about this under Quotes.
- Go to the Sales Order tab in the menu and click on Create Order.
- Enter the customer number or click on the selection button to select a customer from the customer register. If you are unsure about a customer number or a customer name, you can enter a digit or a letter to get a list of all customers who have what you typed in their customer number or name.
Note!
To be able to do this you must activate the autocomplete functionality, under Settings - Sales Order – Autocomplete.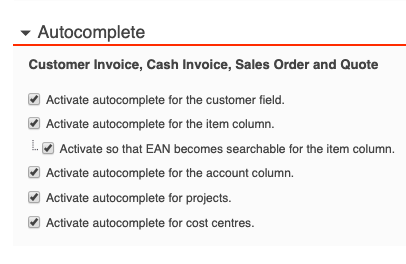
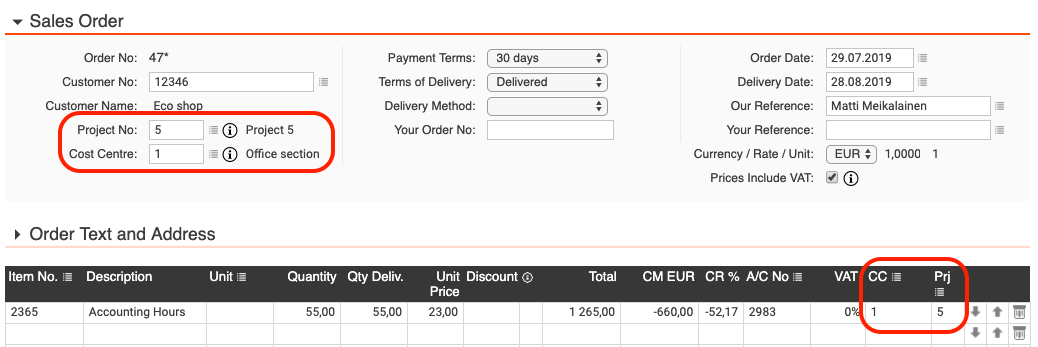
At the top left hand side, you can see what order number the order will get when saved. The order number is only preliminary as long as there is a * after it. - If the entire order is to belong to a project and/or a cost center, enter the project number in the Project no field and the cost center in the Cost center field, or you can click on the selection button to see the project/cost center list and choose one from there. If you want to post different projects/cost centers on the various item rows, select the projects in the Prj column instead and Cost centers in the CC column. Projects can be modified under Registry - Project and cost centers from Registry - Cost Centre.
- The fields Payment terms, Delivery terms and Delivery Method are automatically filled in if you have filled in the information at customer level. You can always change the information directly in the order. If you need more options to choose from, add them under Settings - Sales Order - Payment Terms respectively Settings - Sales Order - Terms of Delivery/Delivery Methods.
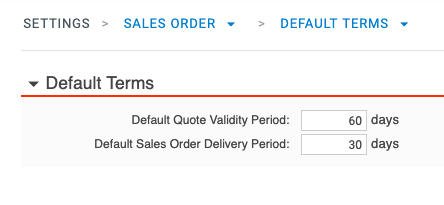
- The current date is shown as the Order date, but you can change it by directly entering a different date or selecting a date via the calendar which you will see if you click on the selection button. The same is true for Delivery Date. The program calculates the delivery date based on the settings you made under Settings - Sales Order - Default Terms. You can, however, change the delivery date directly in the order.
- Our reference and Your reference are automatically filled in if you have entered it set at customer level. If this is not the case, you can fill in the field or click on the selection buttons to choose a reference.
- If the order is to be in a currency other than the base currency, you can change this in the drop-down menu in the Currency field. If you want more currencies to choose from, enter them under Registry - Currency.

- If you want the item rows, freight and invoice charge to be displayed including VAT, then check the box Prices incl. VAT. This settings are also available on each customer in the customer registry.
Note:
The order’s total is shown inclusive of VAT regardless of the box being checked or not.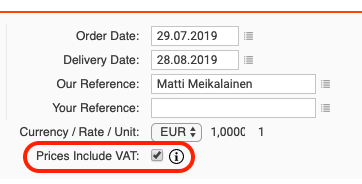
- Click on Order Text and Adress to add an Order Text that will be shown in the order. You do this either by entering one text that is to apply to this order only or by clicking on the selection button to fetch an already saved order text which is being managed under Settings - Sales Order - Document Texts - Order Texts.
If you want to use the same text when you create an invoice from the order, simply check the box Use as invoice text below the order text box.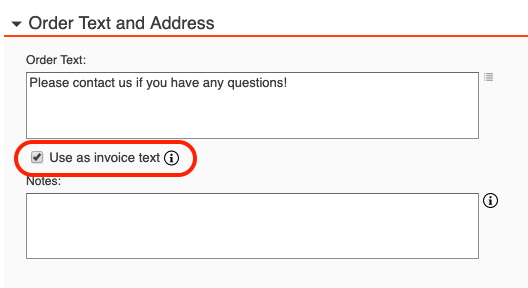
In the Notes field you can register notes for internal use. These notes will not be printed on the order. - The address fields are automatically filled in with the information registered in the customer registry. If the order is to be delivered to another address than the one registered, you can edit it manually.
- Enter items by typing the item number directly in the column, or upload one from the register by clicking on the selection button. If you do not want to use an item from the item register, you can instead enter a name directly, and then specify the Quantity and the Unit price.
-
In the column Qty Deliv. enter the quantity delivered. If you enter fewer items in the field than there are in the field Quantity when you create an invoice from an order, then you are asked if you want to create a backorder. If you answer OK then a new order is automatically created for the remaining items, that is to say those not delivered on the first order. To create an invoice from an order requires that you have Briox Invoicing.
- You can set the number of decimal places you want to be able to use in the Quantity column. You do this under Settings - Purchase Order/Invoicing/Sales Order - Invoice Input View. The more information you have entered on the item in the registry, the more columns will automatically be filled in on the order. The price will be retrieved from the pricelist that is set as default on the customer.
- If you want to add more options for the Unit column, go to Registry - Items - Units.
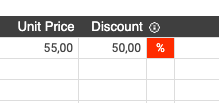
- If you want to enter a discount, do so in the Discount column. Click on your chosen currency respectively % to change the discount from the currency to percent, and vice versa. See below. Each item row is summed automatically. You can also add a discount for a specific customer in the customer registry. This will automatically give that customer a discount on all orders as well as quotes and invoices.
- Under Settings - Sales Order - Invoice Input View, you can activate extra columns, such as CM EUR and CR %, then you can see the Contribution Margin and the Contribution Ratio per row per item, as well as for the whole order (depending on whether you have rights and whether
you have registered a purchase price for the item in the item registry).
- Account (A/C No) is determined:
-Primarily by the sales account registered on the item in the item registry in the Accounts Information section.
-Secondly by the default sales account registered on the customer in the customer registry under the Additional Information section.
-Lastly, by the default account set under Registry - Chart of Accounts - Default Accounts - Purchases.
The VAT rate is determined by what VAT code are registered for the account in question in the Chart of Accounts. - At the top right hand side of the page is the Show/Hide row tool icon, displayed as a pen. If you choose to show row tools, you can use the arrows to move the item rows up and down, and the trash can to clear the rows.

- If necessary, add Shipping Charge and/or Invoice Charge and an Invoice Discount (%), if you are giving a discount on the whole order. If you are unable to write in a field and it is marked as grey, it is because there is no registered default account. Change this under Registry - Chart of Accounts - Default Accounts.
There is also a box called Open. If you tick this box, then no invoices can be created from this order. To immediately create an invoice based on your order, click on Save and the Create Invoice button. - Click on Save when you are done. As long as the order is only saved, and no invoice is created from it, then you can go in and edit the order. If you click on the order so that you can see its detailed view, you can, in addition to editing the order, even delete it by clicking on the Void button.
Note!
A voided order cannot be re-saved.

Comments
0 comments
Please sign in to leave a comment.