You can import a list of assets to the asset registry under Asset Registry - Assets - Import.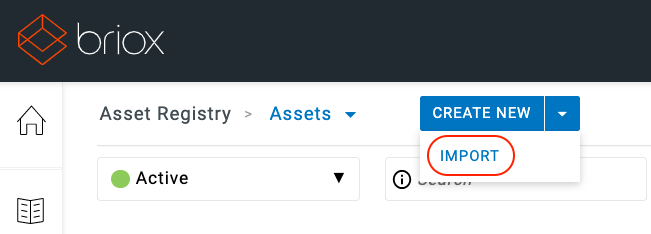
Format:
The information you want to import needs to be organised in columns without any spaces between the rows.
The file formats that can be imported are: TAB, Semicolon and CSV.
Asset statuses
If you are importing a list with different statuses and not using the general setting drop down: you must write them as Follows: : Capitals, no spaces and in English.
NOT_STARTED, ACTIVE, FULLY_DEPRECIATED, SCRAPPED, SOLD
Depreciation Method:
If you are importing a list with different depreciation methods (Straight line or Degressive) and not using the general setting drop down: you must write them as Follows: : Capitals, one word and in English.
STRAIGHT, DEGRESSIVE
Templates
At the end of the article, we have attached template files in Excel and in .csv format (comma delimited).
- Download the comma delimited file to test the import.
- The same file is available in Excel. Here we explain the various fileds of import file and you can see all the information you can import.
The fileds are marked with asterisks as below:
* Obligatory always: Asset Description, Acquisition date, Useful life, Acquisition value, Status
** Obligatory only if the asset has been previously depreciated: Depreciated until date, Opening balance
*** General setting for the Import: (to be input manually of via the general import settings) Asset number, Asset Type number, Depreciation method
Follow the steps below to import a file with your assets:
- Go to Asset Registry - Assets - Import.
- Click on Choose file to upload your file.
- Once the file has been uploaded, you will see the columns in the preview area. See below. If the first row of the file you want to import has headings (as does our example file), please check “Ignore the first row” box so that the headings do not get imported as your first asset.
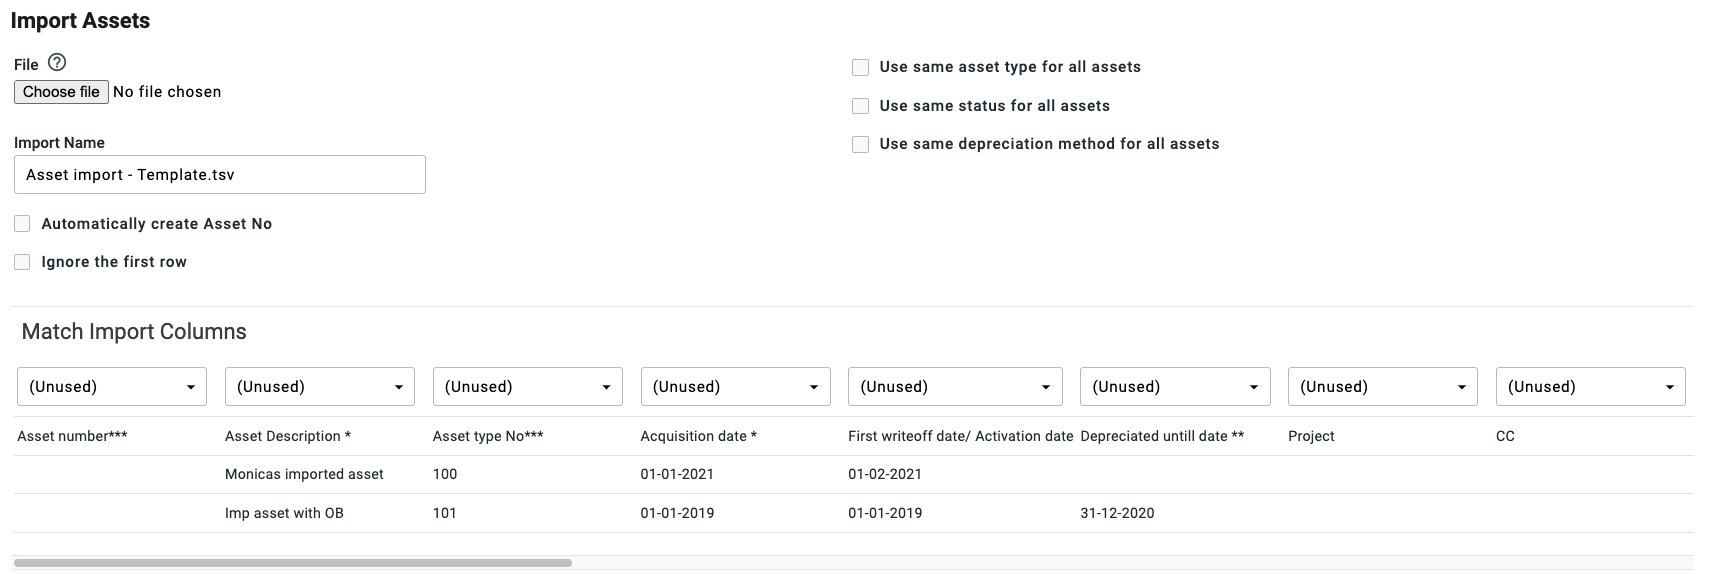
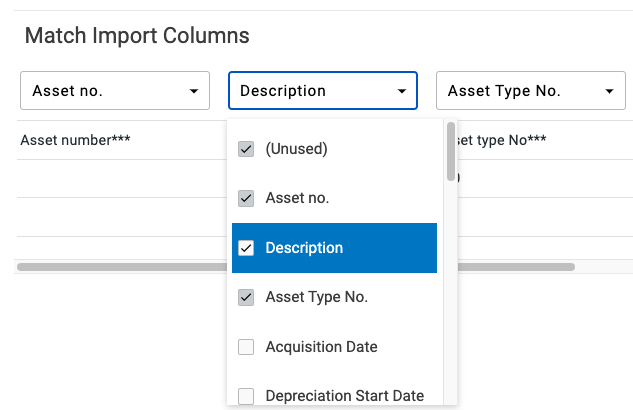
- Now select the correct headings for each column by clicking on the box above each column and ticking the box in front of the designation which best fits the column. You can even choose several designations per column if the same field needs to be input in several places. See the picture below.
-
Once all the columns have been allocated appropriate headings click on the Import File button. Answer OK if you want to confirm the import or Cancel if you want to go back.
-
Once the import is complete, you will be able to see your Assets in your Asset list.
General import Settings and standard values
The following general settings are specific to Briox and can be set for the whole import.
- Drop down for Asset Types
The asset types you can use are found under Asset Registry - Asset Types, you can also set up your own asset types; These will automatically become available for you to use in the import. - Drop down for Asset Status
The statuses available are as in the picture below.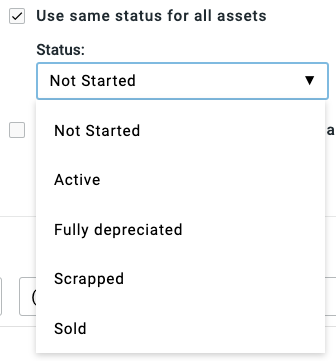
- Drop down for Write off Method (not obligatory)
The methods available are: Straight Line or Degressive. - Asset Number
If you want Briox to create consecutive Asset numbers for you, then check the box “Automatically create Asset No.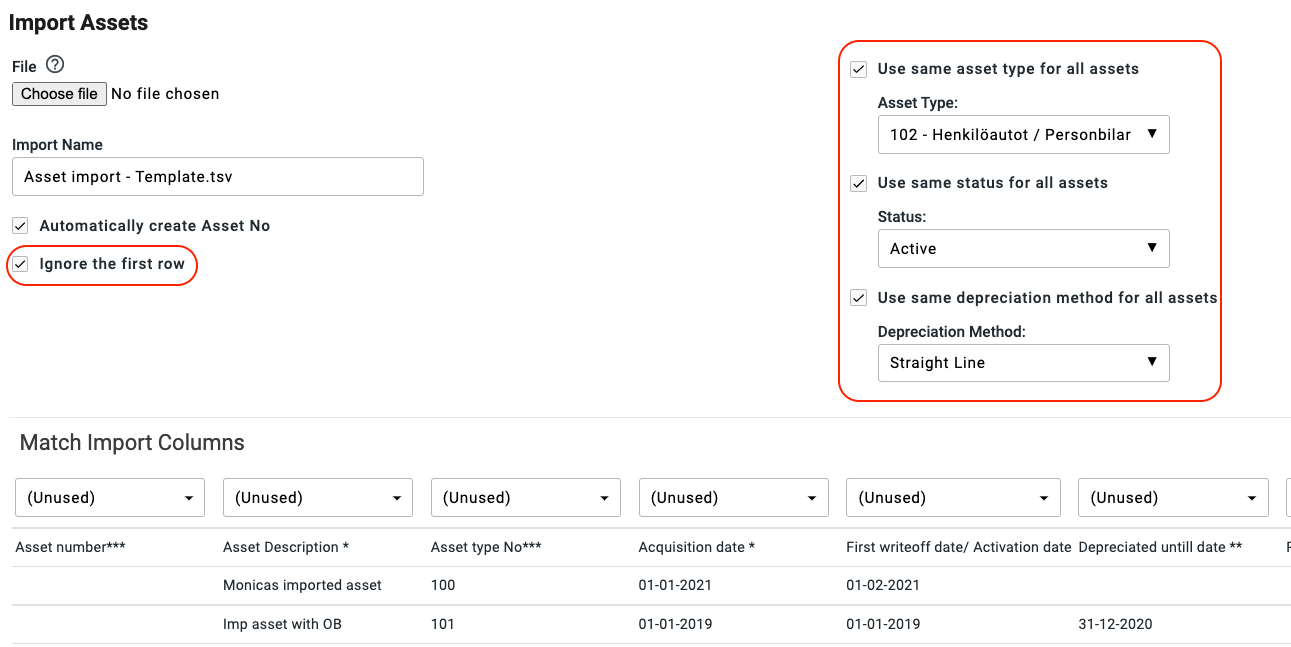
Import History & deleting an import
When the import is complete you will see it logged in the import history below the import fields.
If you want to revert the import and remove the imported assets, simply click on the bin at the end of the row.
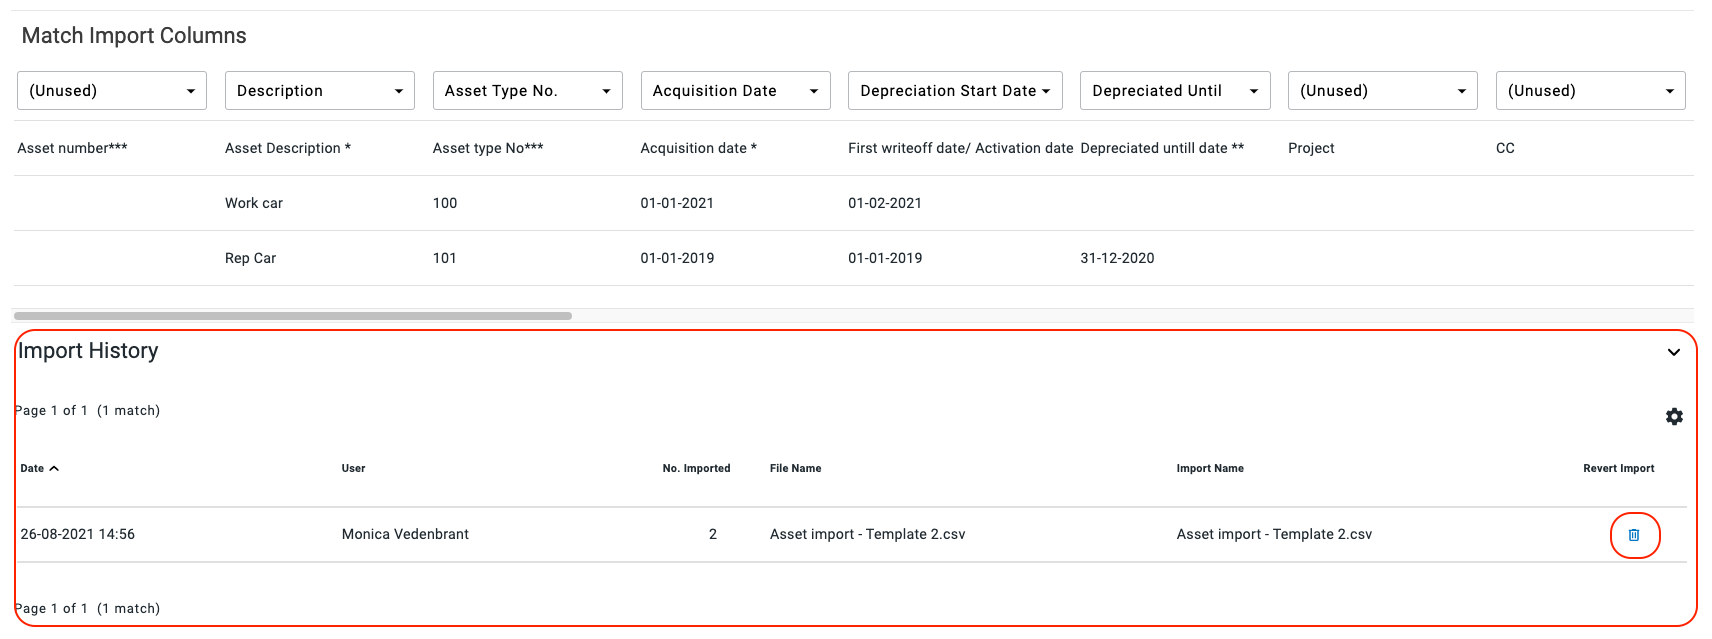
Note: If you want to delete an import but have started to depreciate certain assets, then only the assets that have not been written off in Briox will be removed from the Asset Registry.
Read more about what else can be imported to Briox.

Comments
0 comments
Please sign in to leave a comment.