File specifications
For your import to be successful the file you are going to import must be created according to the specifications described below.
Note:
The more information you import, the less filling-in you need to do on the account level where work is done account by account. This can be very time consuming if you have many accounts in your chart of accounts.
Go to Settings - Accounting - Financial Year. The information your import file contains must be organised in columns in a specific order. Use the templates you access by clicking on the links that appear when you choose own. See below.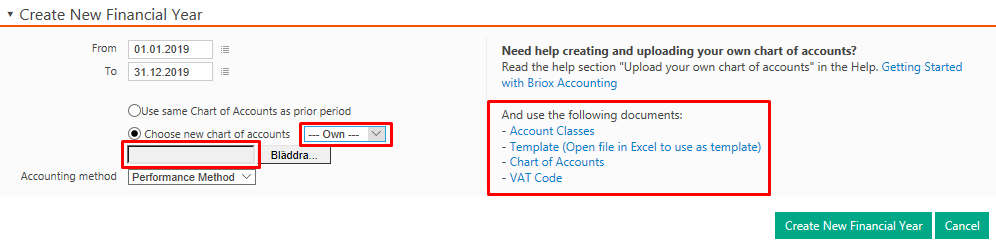
When you have created your import file, save it as a tab-delimited text file (.txt).
If you are a Mac user, please save your file as a Windows Formatted Text (.txt).
You can import following information: account number, account name/description, VAT code, whether the account is active or inactive, the account class it belongs to, and whether the account is default or not. See below. 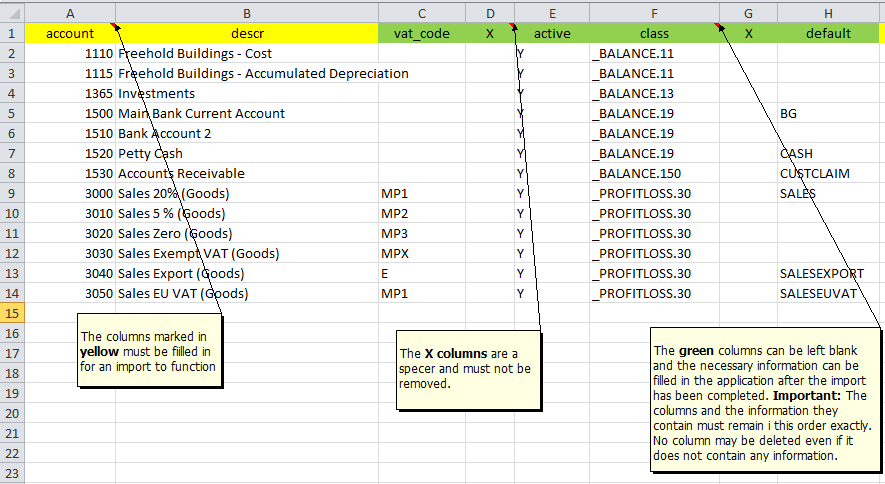
- Account number and Description are mandatory fields and must be completed. The information contained in the columns highlighted in green can be added after the import has been completed. How you do this is explained in the next session: Uploading your chart of account. If you have many accounts in your chart of accounts we recommend you import whether the accounts are active or not as well as what account class they belong to.
- You can read more about the VAT codes in the end of this help article.
- The "X" columns are place markers which ensure all the columns are in the current position. These columns should be left blank but cannot be removed.
- In the Active column please enter "y" if an account is to be imported as active. Otherwise leave the column blank (it is practical to import this information, otherwise accounts must be activated one by one).
- The Account class the accounts belong to, group similar accounts together for reporting purposes and must be registered for your reports to function. You can find out more about account classes in the end of this help article.
Now that you have created your import file, save it as a tab-delimited text file (.txt).
If you are a Mac user, please save your file as a Windows Formatted Text (.txt). 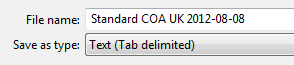
You now have a file you can import.
Uploading your chart of accounts
If you chose to upload your own chart of accounts when creating your first financial year, under Settings - Accounting - Financial Year select the radion button Choose new chart of accounts, select Own in the drop-down menu.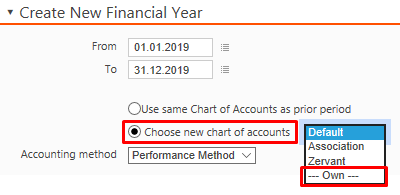
Now you can click on Choose file to select the file containing your chart of accounts. In this view you also have help in the form of templates and other documents that can help you create a file in the proper format and containing information Briox can read. See below. 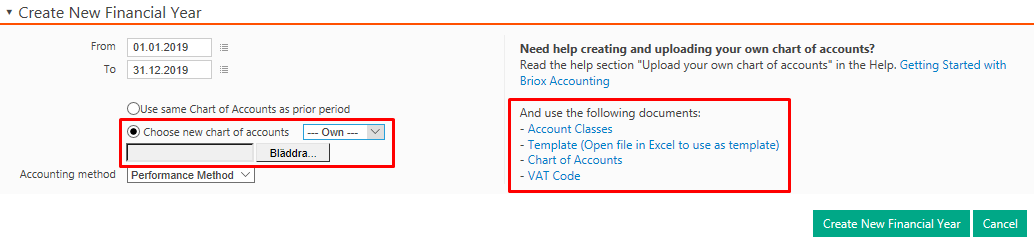
Click on Create a new financial year. A warning text followed by a Control question appears asking if you want to create financial year. Answer OK to continue or Cancel to stop the process.
You have now created a new financial year with your own chart of account. The new financial year is displayed in a new tab in the same view.
You can also check what financial year you are working in by looking at the top right corner of the screen.
Check your chart of accounts
Go to Registry - Chart of accounts to check that all your information has been imported correctly. If you click on a specific account in this view, you will be able to see more detailed account information.
In this view you can also add information that was not included in your import: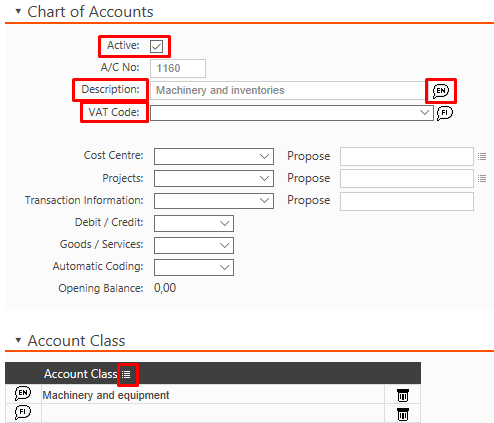
- Check whether the account is active or not. Untick to inactivate.
- You can also chage the name of your account and enter translations by clicking on the language symbol. Remember to save.
- You can select VAT codes from the drop down menu.
- Check if the accounts are connected to the correct Account class for your reports to work correctly. You can select the appropriate account class via the selection button.
If you need to connect some or all of your accounts to an account class, it is both easier and faster to do this under Registry - Chart of accounts - Account classes. Here you choose what account classes you want your accounts to be linked to.
The account class you have selected is underlined in the left column and its details are displayed at the top of the right hand column. If accounts are already linked to the account class, they are displayed in the bottom section of the right hand column. 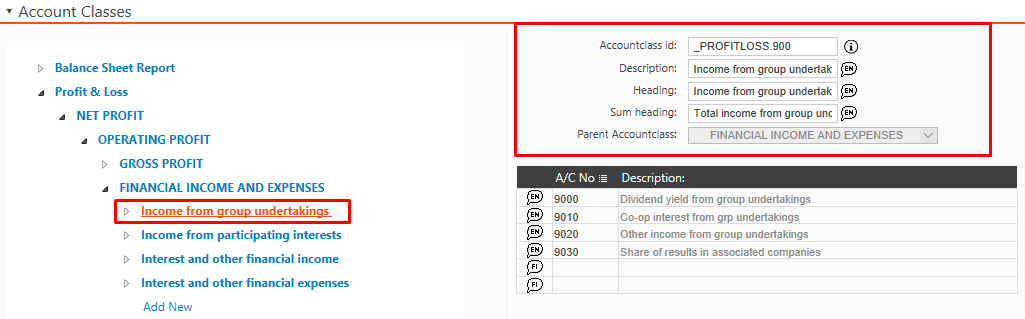
In the right hand column you can enter your accounts by either typing in the account number, or using the selection button. Once you have entered all the accounts that are to be linked to a specific account class, click on Save to continue or Cancel to go back.
Finally, default accounts can be linked to the correct account numbers under Registry - Chart of accounts - Default accounts.
Final control
Lastly, control that everything looks right by printing your chart of accounts as Balance sheet account and Profit & loss with the Chart of accounts report.