To be able to use the project tracking functionality, you must first enable it. Go to Settings - Accounting - Projects.
- Select On, as the functionality is tuned off by default. See below.

- If you want the cursor to stop in the Prj (project) field when you use the Tab or Enter key to move between fields, tick the box Include project in the tab/enter input sequence.
- Click on Save.
Create a New Project
To create a new Project, go to Registry - Projects - Add Project. A form appears where you can fill in the details of the project. Here you can specify what status the project currently has. You can choose between Not Started, Active and Ended in the drop down menu. When finished, click on Save.
Using Project Tracking on Customer and Supplier Invoices, Quotes and Orders
When registering a document, you can work in two ways with projects:
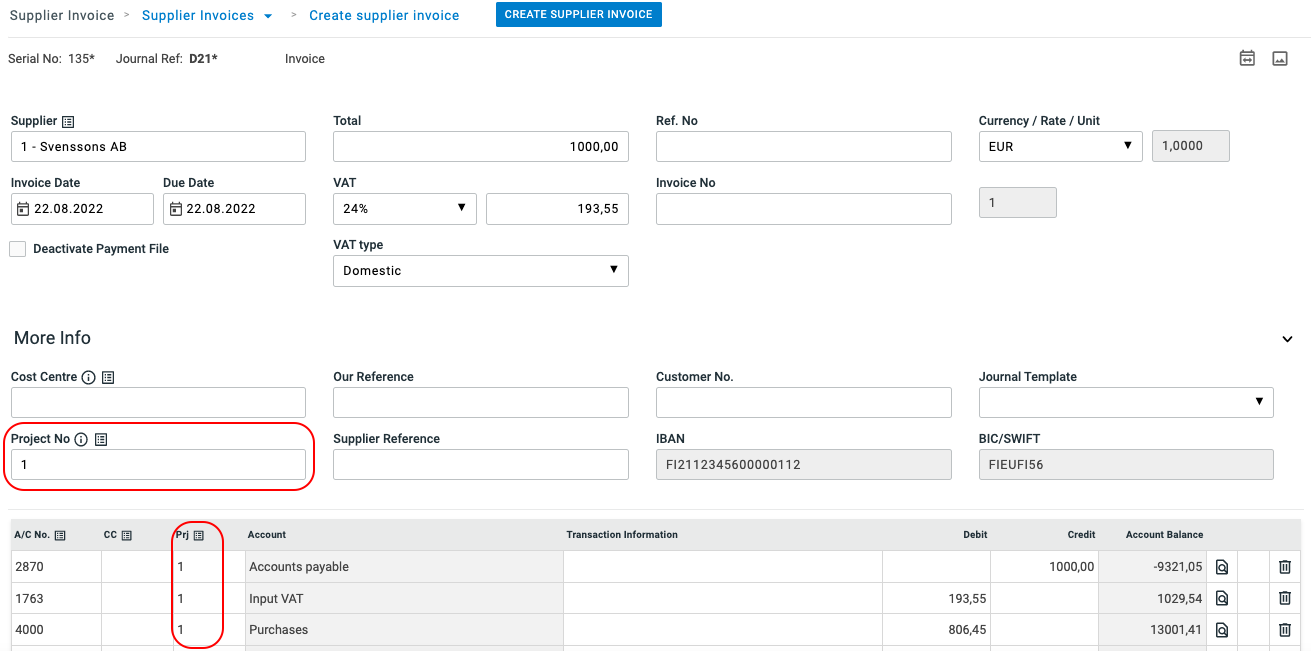
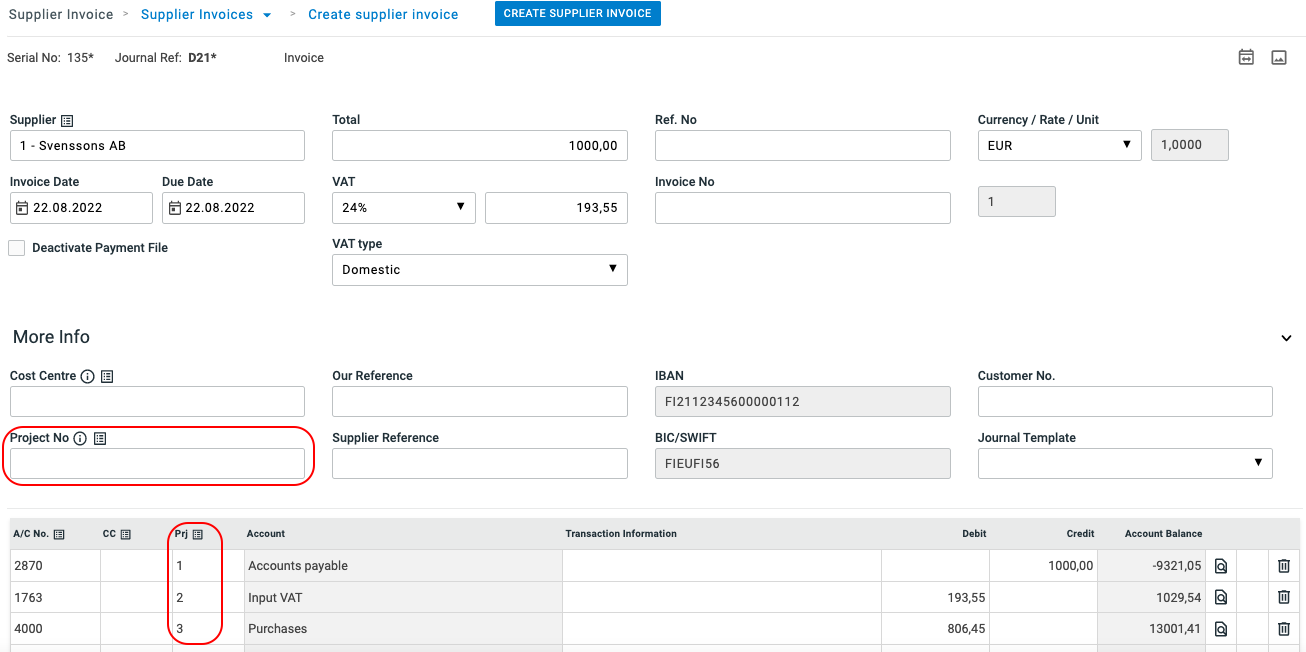
Either you fill in the project number in the field Project no. in the More info section or you fill in the project number per row.
- If you want to mark all the invoice rows with the same project number, then you only need to fill in the project number in the Project number field. The program then records the project number on all invoice rows. The same is true for Supplier invoices, Purchase Orders, Quotes and Sales Orders.

- On the other hand, if you want to register different projects on the various rows of your invoice, then you need to enter a project number for every row in the product column (Prj). The same is true for Supplier Invoices, Purchase Orders, Quotes and Sales Orders.

Link Projects to a Customer or a Supplier
Go to Registry - Customers and choose a customer. Here you can link a project to a customer by entering it under Additional Information. You do the same when linking a project to a supplier: Registry - Suppliers - (choose a supplier) - Additional Information.

Link Projects to Accounts
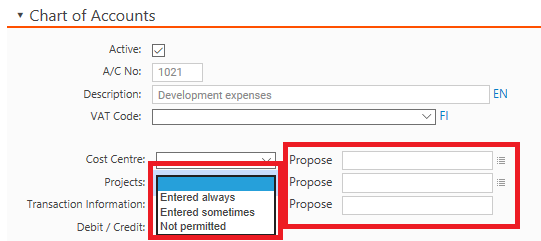
Go to Registry - Chart of Accounts where you land in the list over your accounts. Select which account is to be linked to a project and click on it to open up the information about the account. Choose first the condition that is to govern: If a project should be Always entered, Sometimes entered or Not permitted on this account. Secondly, which project should be proposed if any.

End or delete a project
When a project is to be ended, select the project under Registry - Project. Chose the status Ended in the drop down menu and click Save (see below). The project can then no longer be selected when you create invoices or other documents, or post journals.
A project that is ended can be opened again by simply changing the status to Not Started or Active.

If you want to delete a project, click on the project you want to delete. Then select the red Delete button at the bottom of your screen and confirm that you want to delete the project.
If there are journals or other documents linked to the project, then you cannot remove it and you will receive a warning.
Project Reports
If you want to get an overview of your projects then you can have a look at the report Project Tracking. There are a number of reports within Project Tracking, for example, reports showing pure project data and reports for income, expenses and/or item statistics.
- Go to Reports - Report - Project Tracking. A form appears where you can specify what information you want the report to contain.

- If you do not want the preselected report title, you can simply type your own title in the Report Title field.
- When you have made your selection, click on View on screen / View PDF / or View Excel depending on which format you want to view the report in.
Note: In the following accounting reports, you can also make selections based on projects:
- Balance Sheet Report
- General Ledger
- Account Analysis
- Profit & Loss statement
- Journal List

Comments
0 comments
Please sign in to leave a comment.