The idea behind the integration is that you are able to link and display scanned documents in Briox Accounting. All documents are physically stored in the Briox Archive. To be able to access the Linked documents section of the Document Archive, you must have access rights to Journals and / or Supplier Invoices in Briox Accounting.
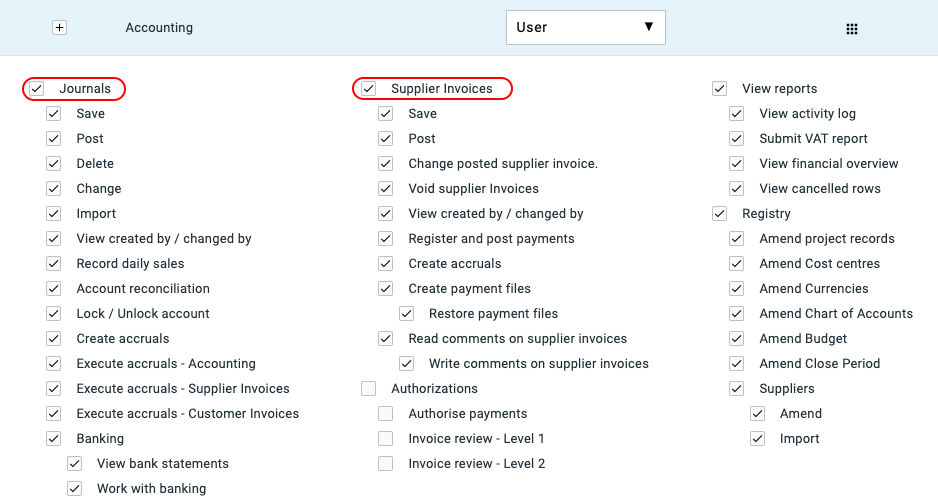
To edit user access rights, go to Admin - Users and click on pen symbol at the end of the row of the user whose rights you want to edit. Click on the expand button at the end of the row of the Accounting module to see detailed rights. Make sure the boxes highlighted below are checked if the user is to have access to Linked Documents in the Archive.
Workflow to link documents to a supplier invoice
1. Go to Supplier Invoice - Supplier invoices.
Click on Create Supplier Invoice if you wish to create a new one or open an existing invoice by clicking on it in the list.
2. If it is not already open, click on the Linked Documents Icon in the toolbar to open the pane on the right hand side of your screen.
The section automatically opens with the supplier invoice inbox selected, and all its documents displayed.
Use the drop-down menu to switch between inboxes. You can also upload a new document directly in the view by dropping it on the drop-zone or clicking on Browse Files.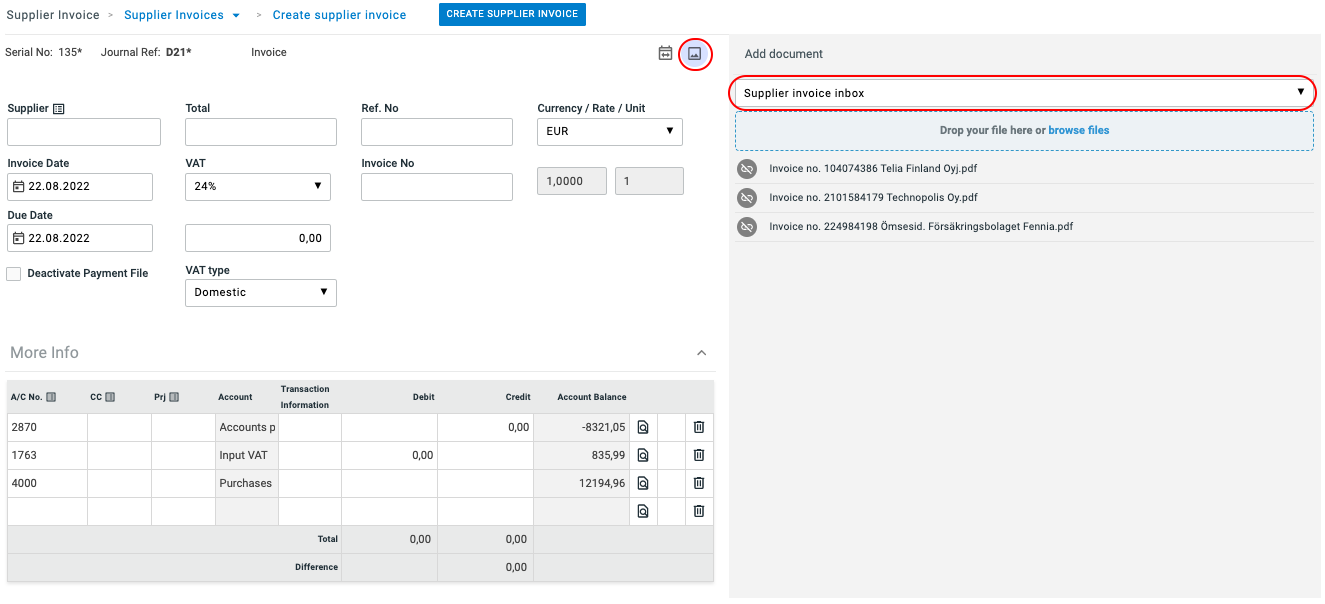
3. To view and link a document click on the link icon or file name. When the document is linked the icon is light up in blue.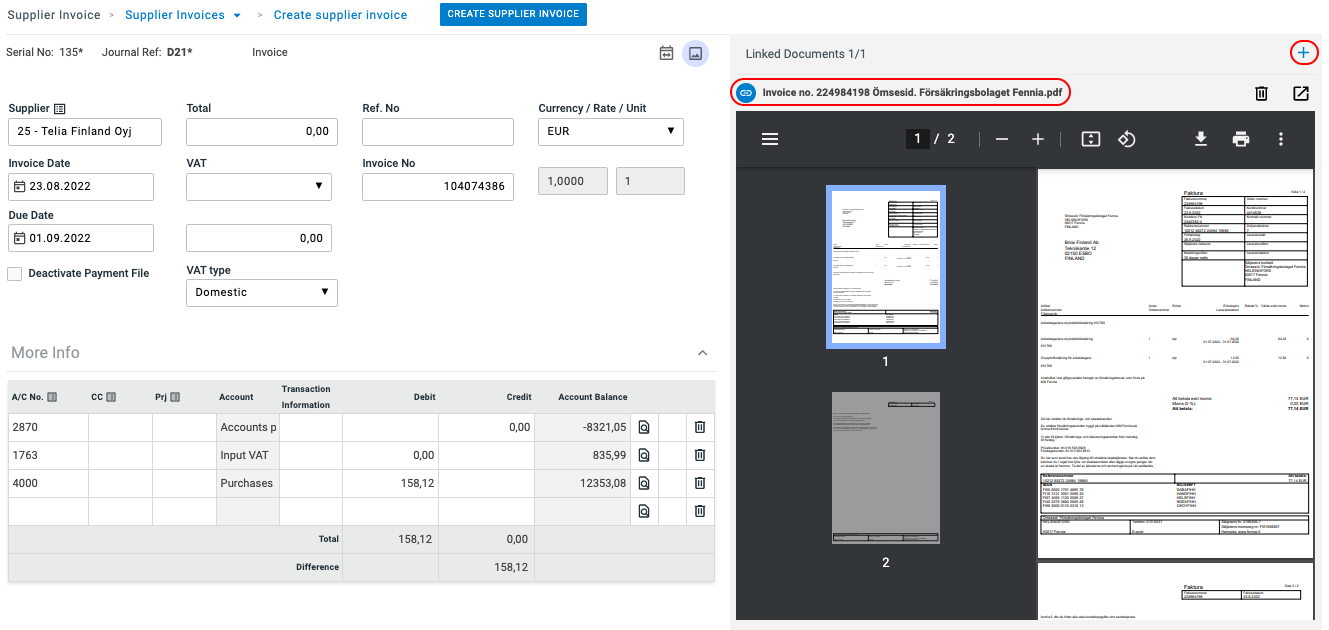 Now you can proceed to code your supplier invoice and finish off by saving.
- If you want to link more documents to the invoice click on the + sign.
- If you want to unlink the document click on the link icon or file name. The icon will no longer be light up in blue as the document is unlinked. When unlinked, the document is then returned to the inbox it came from.
- If you want to delete a document from the linked document inbox, click on the bin icon
- If you want to detach the image to view it in a separate pane and be able to move it around on your screen(s), click on the detach icon

4. When you link a document, you can see the number of documents linked to an invoice in parenthesis by the tab name. Use the arrows in the pane to browse between the linked images. See below.
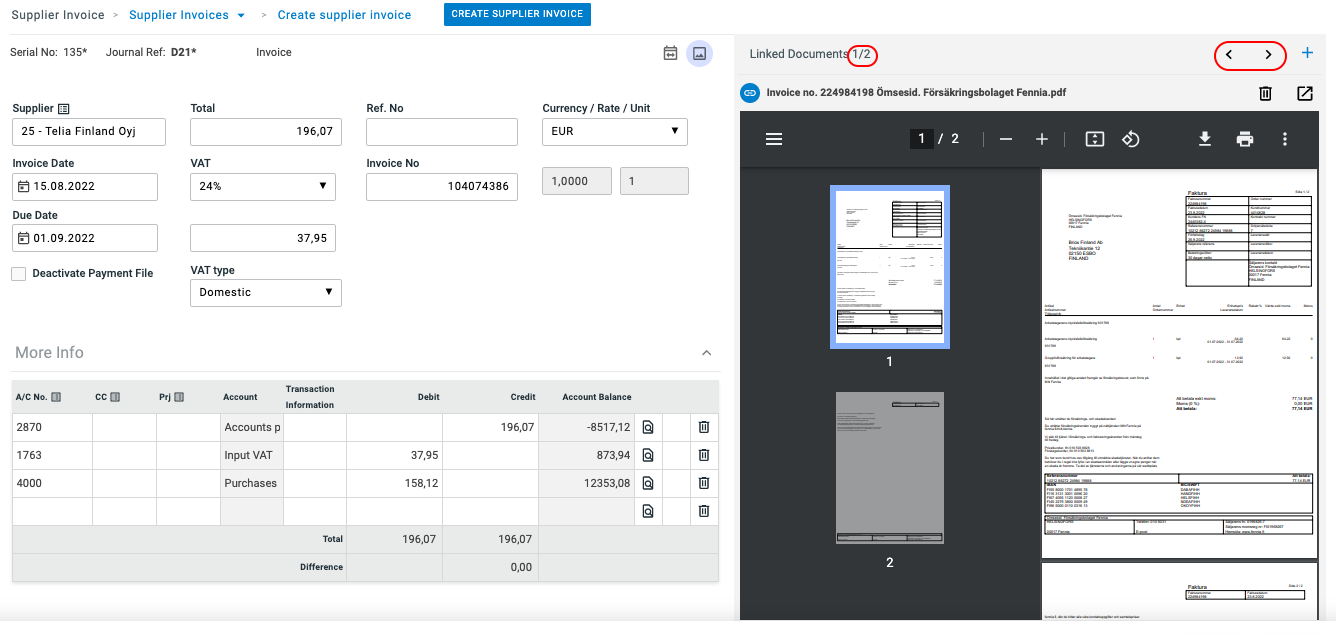
5. The number by the Linked Documents Icon also indicates how many documents are linked to the specific invoice. See below.

6. The side pane remains open until you click on the Linked Documents icon again to close it.
Workflow to link documents to a journal
1. Go to Accounting - Journals - Create Journal.
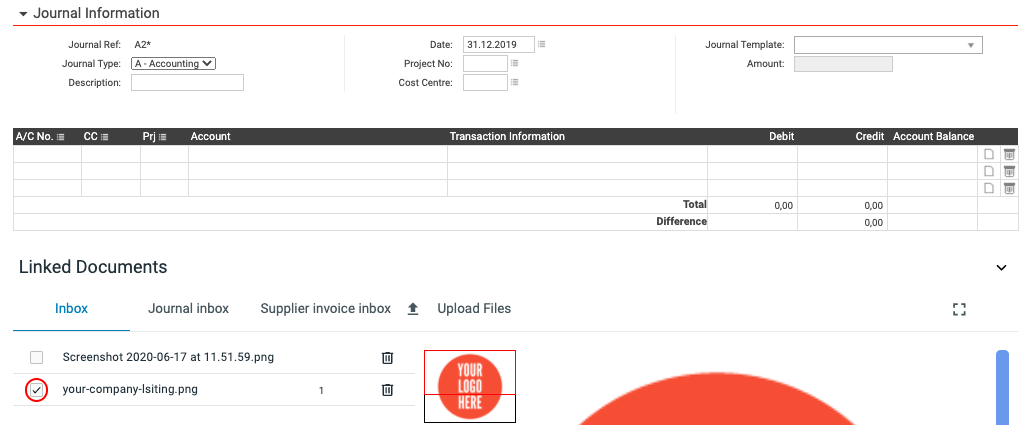
When you create a new journal, you see a list over all the documents which are available in the Inbox under Linked Documents. See below. These documents have not yet been linked to a journal or a supplier invoice. As soon as a document is linked, it disappears from the inbox.

2. Tick the box in front of the document you want to link to the journal. See below. When you have ticked the box, the content of the document appears in a display section on the right side of the screen. Then click on Post or Save.
3. When you look at the journal list or the supplier invoice list, (under Accounting - Journals - List or Supplier Invoice - Supplier Invoices) an icon on the far right, indicates that a document is linked to the journal or the supplier invoice. See below. Click on the icon to view the document.

4. Go to Accounting - Journals - List and open a journal by clicking on it. You will find the Show linked source documentation icon in the toolbar in the top right hand corner.

Click on the icon and the source document display view will open. In this view, you can unlink one or more images from the journal to which they were previously linked. See below.
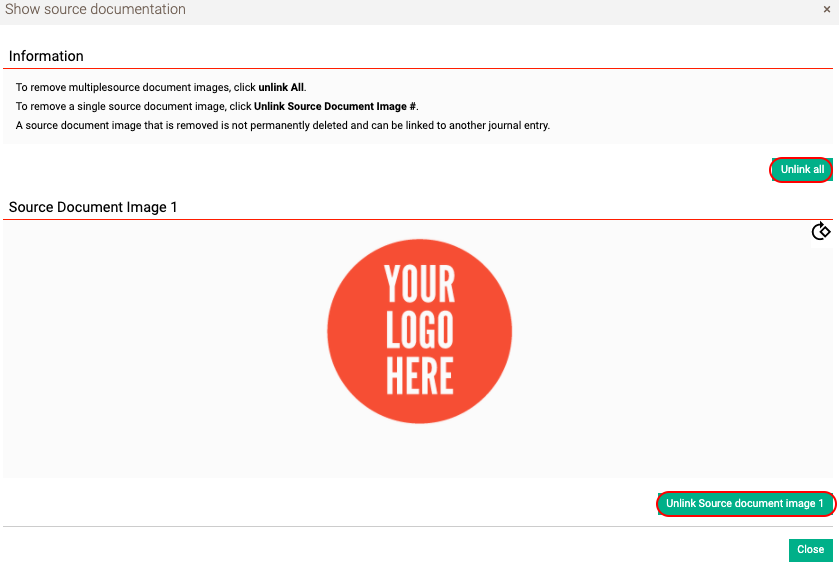
5. Unlinked documents are returned to the Archive’s Linked Documents Inbox and are available for linking again.
If you want to delete the document you can click on the recycling bin at the end of the line. See below.


Comments
0 comments
Please sign in to leave a comment.